» Site Navigation

2 members and 1,815 guests
Most users ever online was 54,199, 06-29-2026 at 02:43 AM.
» Today's Birthdays
» Stats
Members: 76,104
Threads: 249,252
Posts: 2,572,973
Top Poster: JLC (31,651)
|
-
Registered User


Started building my permanent enclosure for my Boa
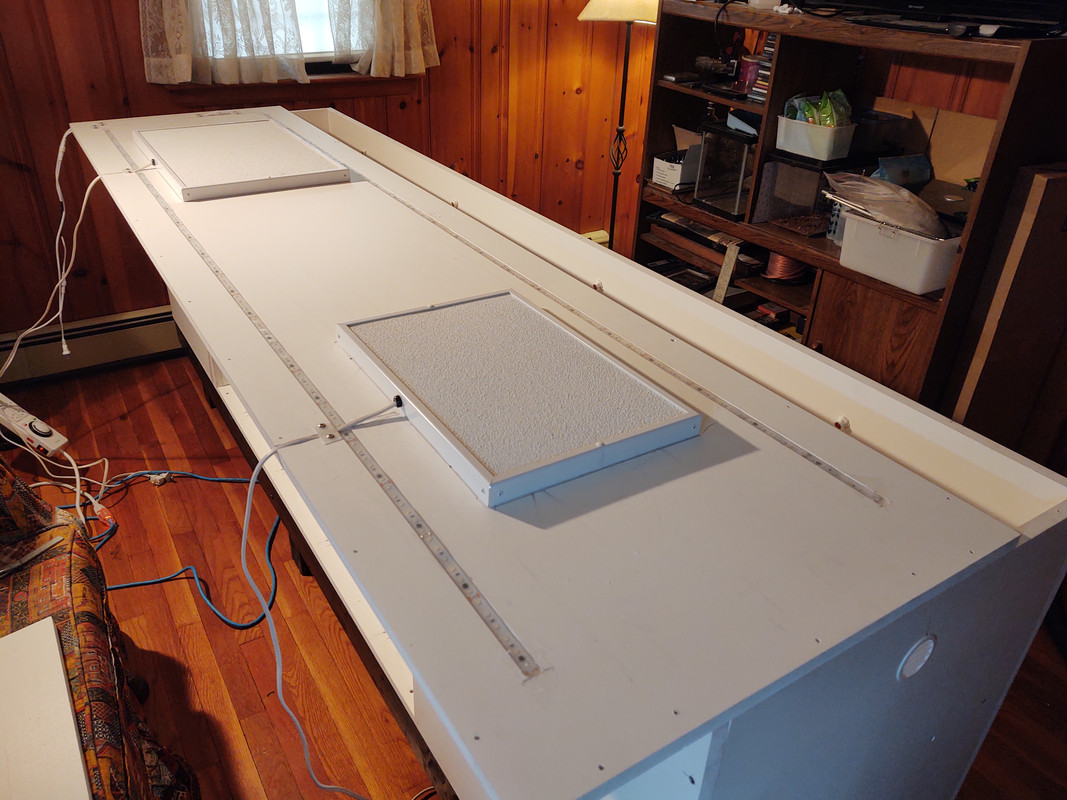
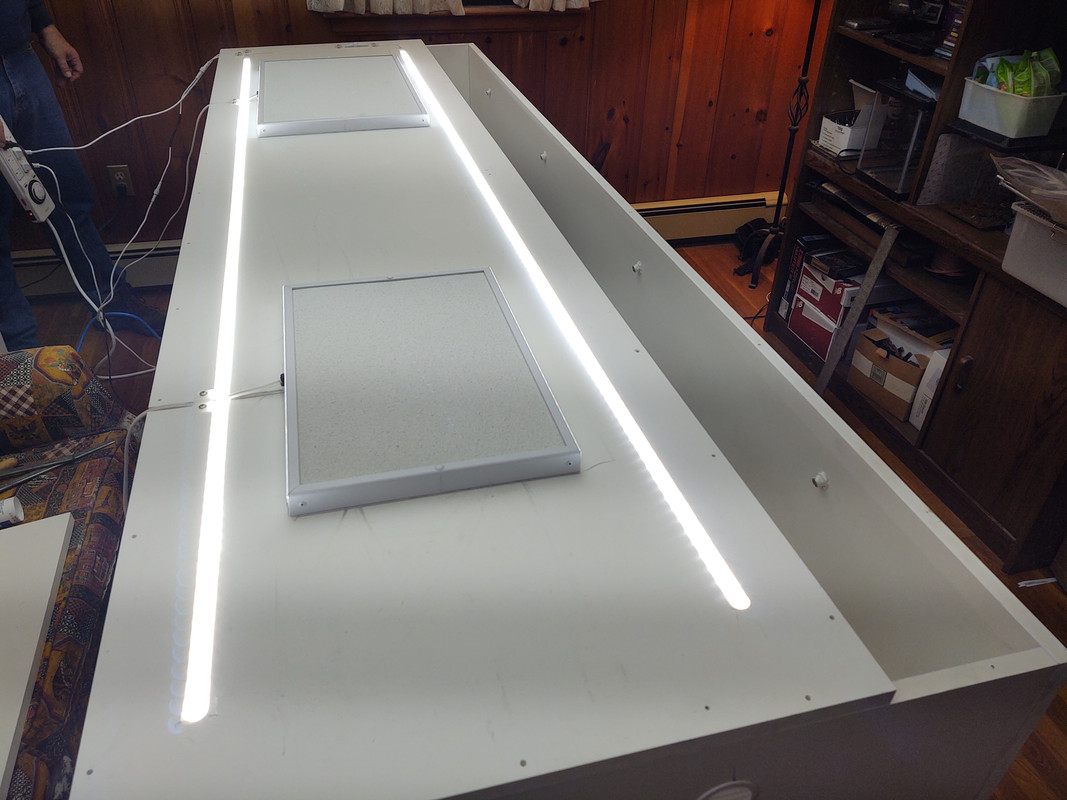
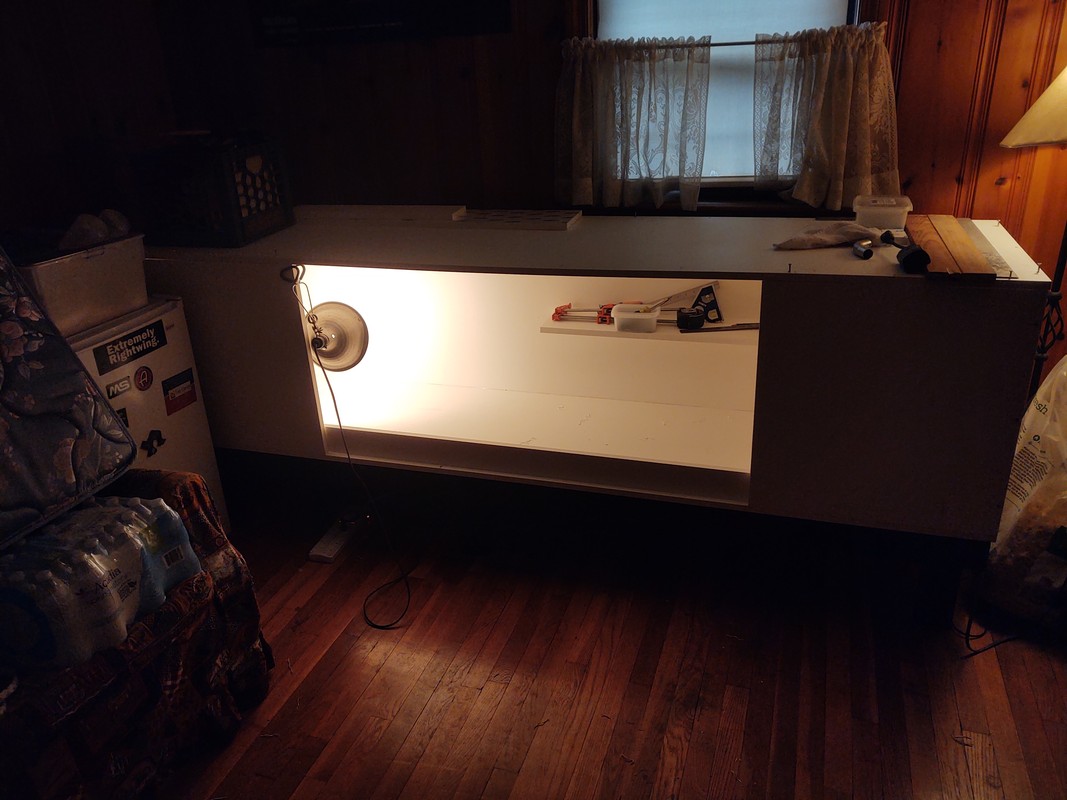
I had been looking at and pricing larger cages for when my Boa gets bigger/older. I like animal plastics (and have on order a 24" X 24" X 36" tall for the amazon Basin Emerald tree Boa I plan on purchasing) but the 14-16 week lead time and shipping kind of made me look at other options. My local lumber yard has AZEK 3/4" X 4' X 8' sheets part # AS03448096 Our material would be considered 100% cellular PVC that I had them rip down the center for 4 equal 24" X 96" pieces. I used stainless square drive screws 3" from each corner and every 8-9" depending on needed spacing. I used food grade clear silicone between the bottom and sides and front pieces. I will still run a bead around the inside and up about 8" in all the corners. I placed an 8' 3/4" X 96" piece in front to keep substrate and water from leaking. I built it in top of a 24" X 96" X 12" high stand made out of 4 2" X 4" and painted it black. I originally was going to do birch plywood but the weight and the cost of waterproofing and sealing made me decide to go this route.
I am now waiting for my 2 pro heat panels and misting system before going any further. I want to lay everything out and router grooves for my dimmable LED strip and the PHP cords. I am ordering the glass on Monday.
I also plan on going bio-active with this enclosure. My Boa is 9 months old 500 grams and about 36" long so I think I have plenty of time to get it ready and get the temps and humidity correct.

Last edited by Alien; 01-25-2020 at 12:44 PM.
-
The Following User Says Thank You to Alien For This Useful Post:
-
Registered User

Looks really sharp so far! Nice job!
-
The Following User Says Thank You to Naginii For This Useful Post:
-
Re: Started building my permanent enclosure for my Boa
Nice job. Looks good. When working with that PVC did you pre drill the screw holes it was it fine to just screw it.
1.0 Bearded Dragon
0.1 Super Pastel Lesser Ball Python
1.0 Pastel Bamboo Ball Python
0.0.1 Halmahera Blue Tongue Skink
0.0.2 Crested Gecko
1.2.Guinea Pigs
1.0 Leopard Gecko
0.1 Toad
0.1 Iguana
0.1 Dog
0.2 Cats
-
-
Registered User
At first I thought I would have to use a countersink but the screws sunk nicely. You could probably not predrill but I did. I laid the top and bottom On top of each other marked all the holes slightly smaller than the screw. I did not drill the ends where the screws went into. It all pulled together nicely, not perfect but will serve its purpose.
-
-
Re: Started building my permanent enclosure for my Boa
That's good to know. What didn't go together quite perfect? Due to not perfect cuts or something else? I build wooden cages and have had some let than stellar cuts to deal with.
1.0 Bearded Dragon
0.1 Super Pastel Lesser Ball Python
1.0 Pastel Bamboo Ball Python
0.0.1 Halmahera Blue Tongue Skink
0.0.2 Crested Gecko
1.2.Guinea Pigs
1.0 Leopard Gecko
0.1 Toad
0.1 Iguana
0.1 Dog
0.2 Cats
-
-
Registered User
Yes a couple of cuts not perfect. We're talking 1/16th in a couple places. Most would never know, I do.
-
-
Registered User
-
The Following 3 Users Say Thank You to Alien For This Useful Post:
gunkle (02-01-2020),lew-e (02-02-2020),Meghenebk (02-02-2020)
-
Registered User

Looks beautiful!
How do you use T nuts to hold the rhp's? Flat side of the t nut on the outside top and a hole drolled through the roof with the bolt coming from inside the enclosure like mounting it through wood?
-
-
Registered User
Re: Started building my permanent enclosure for my Boa
 Originally Posted by Meghenebk

Looks beautiful!
How do you use T nuts to hold the rhp's? Flat side of the t nut on the outside top and a hole drolled through the roof with the bolt coming from inside the enclosure like mounting it through wood?
Yes, I even recessed the top just below the surface. I placed a piece of tape over the open thread. Then I filled in the recess with white marine epoxy.
-
-
-
Posting Permissions
- You may not post new threads
- You may not post replies
- You may not post attachments
- You may not edit your posts
-
Forum Rules
|


 Reply With Quote