» Site Navigation

0 members and 943 guests
No Members online
Most users ever online was 47,180, 07-16-2025 at 05:30 PM.
» Today's Birthdays

» Stats

Members: 75,945
Threads: 249,142
Posts: 2,572,345
Top Poster: JLC (31,651)
|
-
Registered User


Indigo's Sculpey Clay hides - step by step! (Massive DUW!)
People seemed to like the little hides made out of Sculpey brand clay that I (my husband) made for my baby Temptation, so when I decided I'd make one for Levi, my big guy, I'd post a how-to... and do it myself! So, here we go. 
What's needed:
-Sculpey Clay (check www.sculpey.com for availability) or a similar oven-cured clay
-Aluminum foil
-An oven-safe bowl to use as a base for the shape
-A functioning oven
-A clean, flat surface, covered in paper that is securely taped down
-Time and patience!
First, I covered my lap desk in printer paper. I used clear scotch tape, but as I learned while I was doing this, you'll need something stronger, because the Sculpey sticks to the paper pretty well.

I took a cue from Jason and decided to use an oven-safe bowl as a support structure. The one I used for this was too big, but it was the only one he fit into without bits sticking out. And he won't outgrow it for a long time. Here's Jason, my husband, modeling our bowl selection. It's a Pyrex of undetermined size.

I covered the bowl in aluminum foil, so it wouldn't ruin it and so it would come off easier. I had two boxes of Sculpey at my disposal, 1.75 pounds each. Each of Temptation's little ones used just half a box each, but I ended up using a box and a half for Levi's. The screwdriver is not a part of the process... it was just there.

Then came the actual formation of the hide. I asked Jason how he did it, and he said he rolled it out and just laid it on top of the bowl, like placing fondant on a cake, and shaped it from there. After a couple of comments relating to Ace of Cakes, I did my best at rolling it out evenly (1/4 inch thick is the goal for easiest baking) and placing and shaping. I didn't do nearly as well as he did, but he'd taken sculpture in school and the extent of my claywork was making a pyramid-shaped ceramic box like 10 years ago. I left the entrance hole bigger, so he can continue to use it as he grows. He's a fat snake.

It's not pretty, but it's functional. I added a little lip over the entrance at the last minute. Onto the baking sheet, on aluminum foil, it went. It was baked the first time at 275 degrees, for about 30 minutes, and the second time, without the bowl or aluminum foil, for about 15 minutes.

Fresh out of the oven from the second bake, it's a nice matte terra-cotta color. The clay still felt a little soft, but hardened completely as it cooled. Make sure it's completely cool before you introduce it! That stuff gets hot.

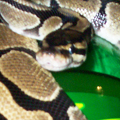
And here it is, receiving the Levi stamp of approval. At least the one that doesn't involve changing out the tank. 

I hope you found this informative, and hope to try it yourself! And if you want a couple, but are worse with clay than I am, I'd be happy to make and sell some. 
-
 Posting Permissions
- You may not post new threads
- You may not post replies
- You may not post attachments
- You may not edit your posts
-
Forum Rules
|


 Reply With Quote