» Site Navigation

0 members and 2,814 guests
No Members online
Most users ever online was 6,337, 01-24-2020 at 04:30 AM.
» Today's Birthdays
» Stats
Members: 75,078
Threads: 248,524
Posts: 2,568,615
Top Poster: JLC (31,651)
|
-
BPnet Veteran


Building a rack...
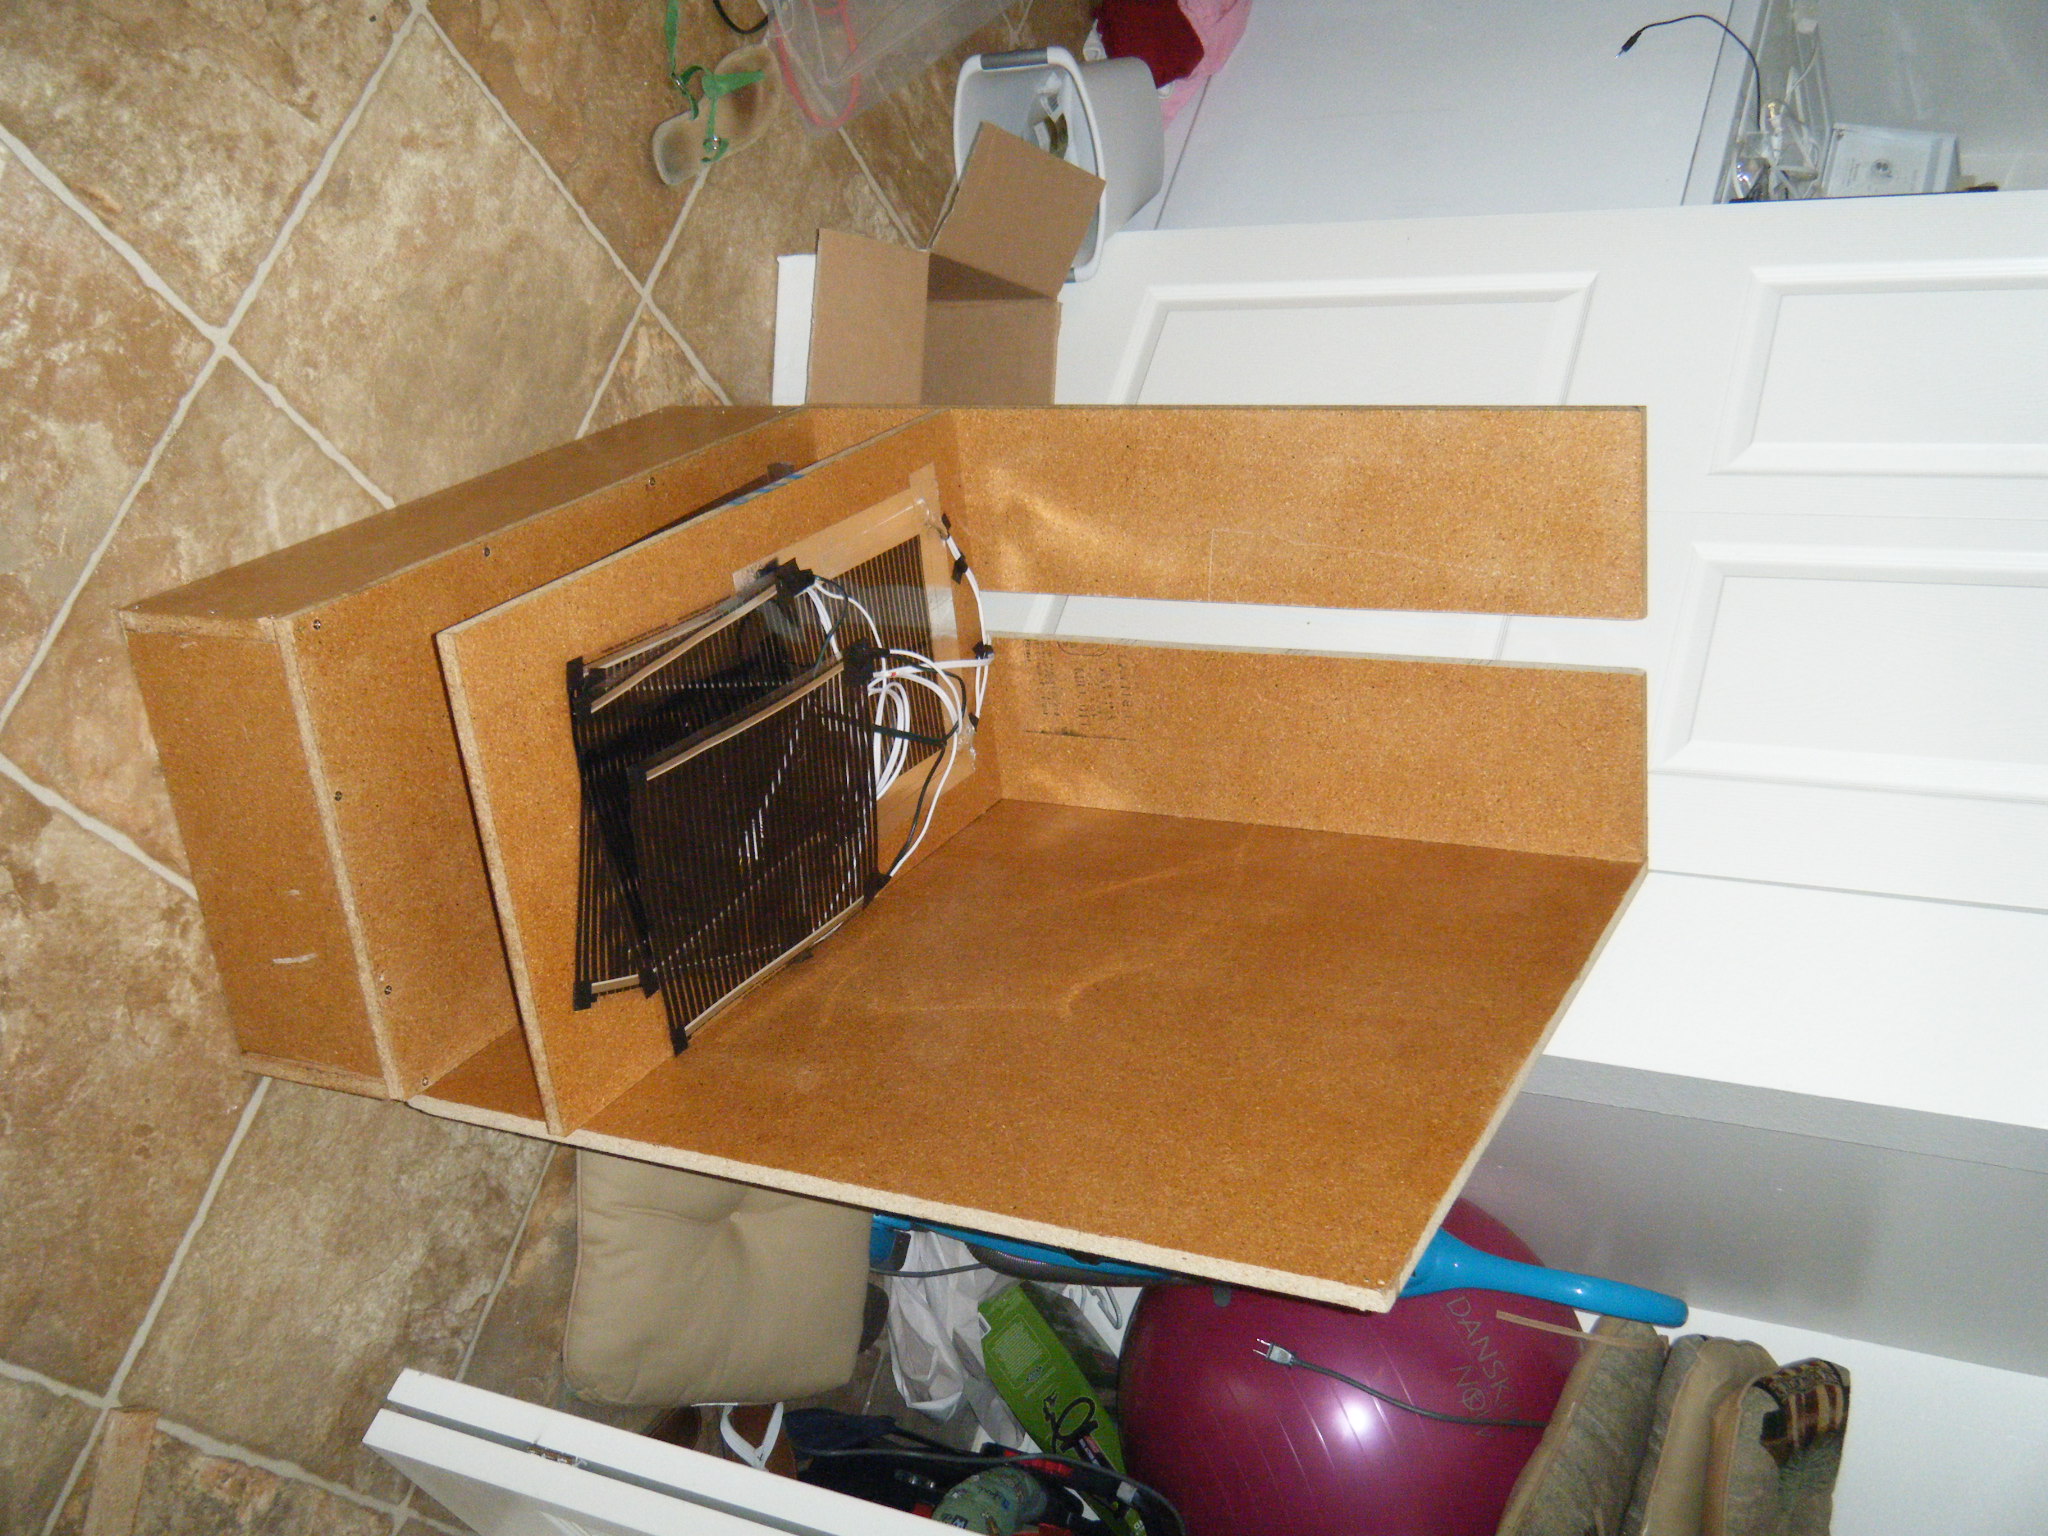
Ok guys I have begun the journey into rack building. I have 5 snakes, so its a small rack designed for 5 tubs, or 4 tubs and a tank on top for aesthetics. I bought the supplies, and I unfortunately went the cheap route and chose 3/4"particle board over melamine, which is curing right now with polyurethane sealant, but I think Ill be alright based off of everything I read on this site. So anyway here is what I have, and pics will be up after I am done.
6 shelves 29"x17"
1 back 17"x35"
2 sides 29"x35"
5 Sterilite 1926 tubs (34qt/32L)
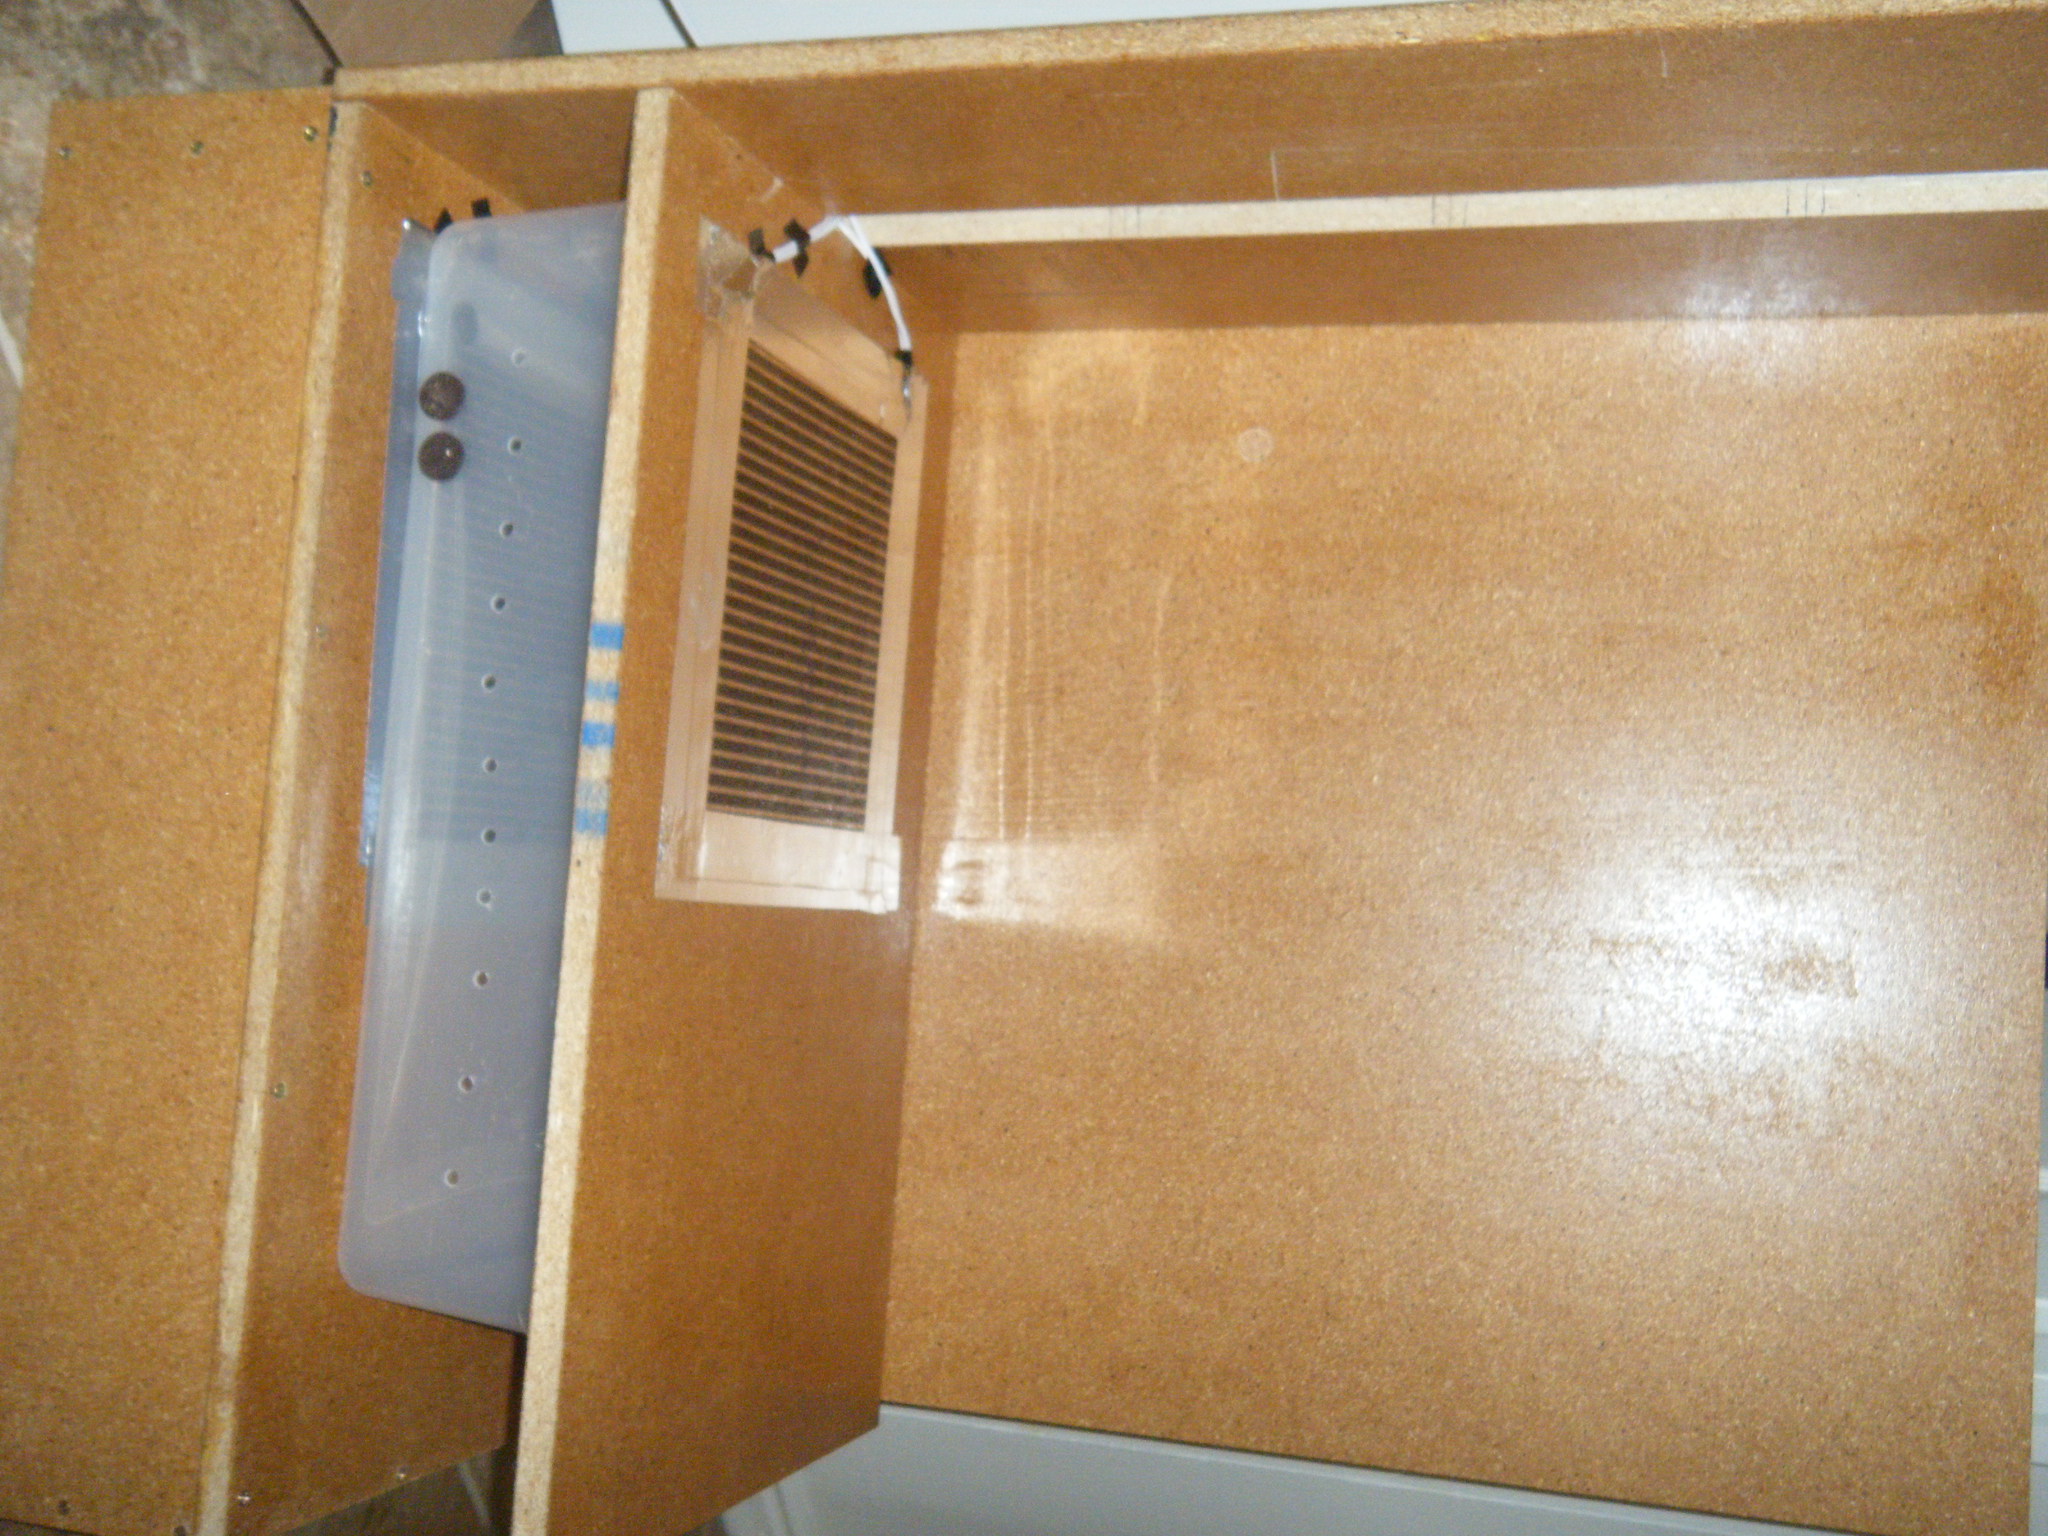
6ft 11" Flexwatt
3 6ft Extension Cords to be split and spliced for Flexwatt
1 Herpstat proportional thermostat
5 Thermo/hygro
1 qt Polyurethane coating
Extension cord, water bowls, newspapers
-
-
BPnet Veteran

Re: Building a rack...
Looks like you have everything as far as materials go minus the screws which I'm sure are there.
However, a LOT can be said for having the proper tools. When I put mine together a chalk line, level, drill, and soldering iron made my life very easy.
-
The Following User Says Thank You to ScottyBoa For This Useful Post:
-
BPnet Veteran
Re: Building a rack...
I have a level and drill, buying the soldering iron tomorrow. Chalk lines a good idea though, thanks!
-
-
BPnet Veteran
Re: Building a rack...
Yeah a chalk line is about $5 at home cheapo, just remember to buy the actual chalk too since they don't come full lol. But yeah a chalk line is essential to rack building IMO. Do 3 lines vertical first, like 1-2" in from the front and back and then 1 more even in between those. Then you just mark each shelf as you install. Where the lines intersect is exactly where you drill.
Also, a good method to get the spacing right is to use the tubs themselves. Get the first shelf on the bottom level using shims or whatever. Once it is secured with screws then just put down some blank CDs as spacers, the tub on top of that and then the next shelf on top of the tub. Mark with the chalk line and drill your holes.
-
-
BPnet Veteran
Re: Building a rack...
Sweet. Will do. Beanfarm sent me my shipping confirmation...I see Tuesday/Wednesday being the official completion.
-
-
BPnet Veteran
Re: Building a rack...
Ok so Herpstat and Flexwatt came in today. Whoo hoo. Shame that they got here before my particle board finished curing...=/
-
-
BPnet Veteran
-
Posting Permissions
- You may not post new threads
- You may not post replies
- You may not post attachments
- You may not edit your posts
-
Forum Rules
|


 Reply With Quote