


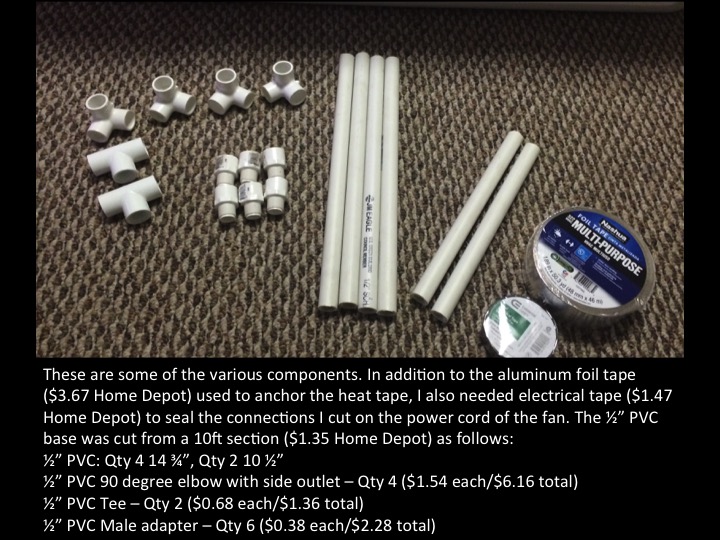
I thought I’d share my DIY incubator build for anyone interested in a relatively quick, inexpensive incubator that can hold 8+ clutches. My total invested was under $175 with tax and shipping of various components. If you have to add a Herpstat or equivalent, plan on adding $100+ to the total cost.
I have no DIY skills so if I can do this, anyone can.
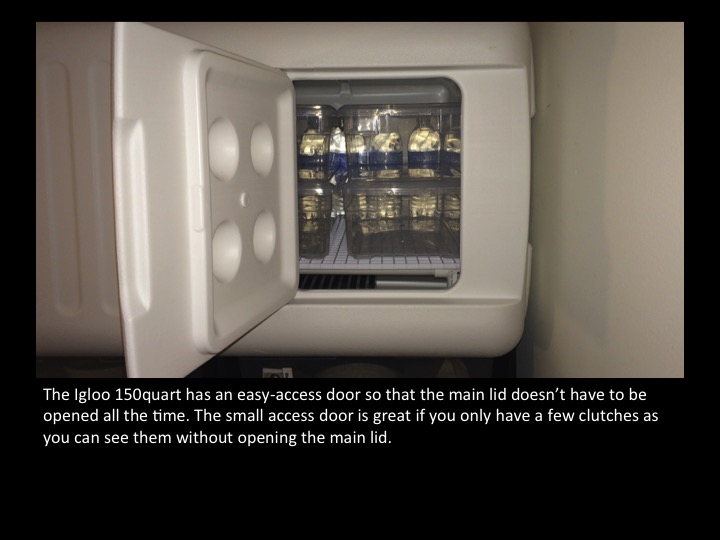
I selected the 150 quart with the specific shoe boxes from The Container Store because I can get two rows of 4 containers for a total of 8 containers in the incubator. The containers are just slightly smaller than the Sterilite 6 quart. When I measured a Sterilite 6 quart I had with the lid on, total outer dimensions were 13.75x8.25x4.5. The length of the Sterilite shoebox (13.75”) prevents it from fitting at the bottom portion of the cooler (only 13.5”). The shoeboxes I selected allow for maximum use of the cooler. All of this was done BEFORE I decided to lay the cooler on its side. The standard 6 quart Sterilite shoes boxes do fit when the cooler is on its side.
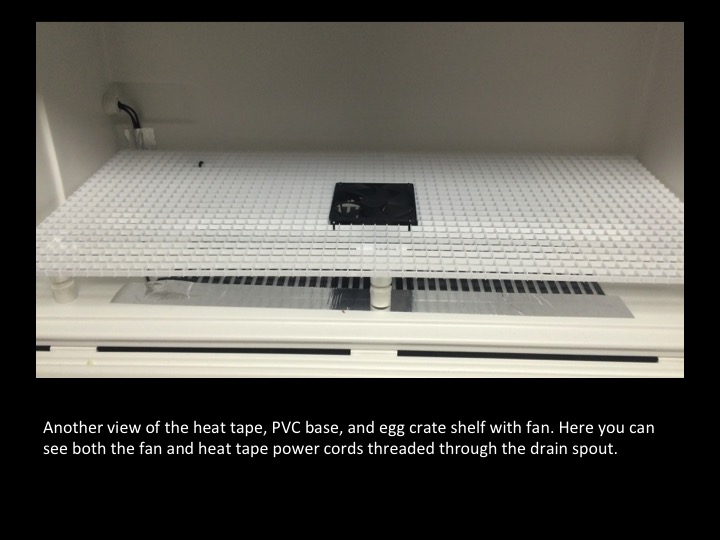
Keep in mind a few things that I learned the hard way. First, think about what needs to go through the drain spout of the cooler. I had connected my THG heat tape BEFORE threading the power cord through the drain spout. Oops. Also, make sure you know which direction you want your fan to blow and install it accordingly. I caught that oops before tying the fan down. If you plan to make modifications, always keep in mind the height difference from front to back if you lay the cooler on its side. The approximate 1/4” extended lip that runs the inner perimeter of the bottom half of the cooler can play with your measurements. Also, make sure you have a good pair of crimping pliers to put the THG heat tape together…or know where you can get a pair. Home Depot didn’t have what I was looking for so I had to improvise. I wouldn’t recommend improvising.
Finally, the only way I could do this was with the help of others. Thanks to the following:
- SSScales was the first page that got me thinking (http://ssscales.com/archives/804).
- Albey’s great post with pictures got me hooked on the cooler laying on its side (http://www.reptileradio.net/ball-pyt...tml#post134773)
- Riera Reptiles on Facebook. I purchased two of their thermometer/hygrometer combos to use in the incubator and they work perfectly. I set the herpstat at 87 and the temperature ranges from 87.4-87.7.
- RLReptiles’ DIY post at Bush League Breeders Club forum (http://www.reptileradio.net/racks-ca...-pictures.html). I learned from this great picture tutorial that the water bottles shouldn’t be placed directly on the heat tape. I also used the same fan placement and similar PVC base.
- MillCreekConstrictor’s post at Bush League Breeders Club forum (http://www.reptileradio.net/racks-ca...-pictures.html). This helped me with fan placement in relation to the egg crate.
Enjoy!
-Matt


 Reply With Quote