» Site Navigation

1 members and 2,784 guests
Most users ever online was 6,337, 01-24-2020 at 04:30 AM.
» Today's Birthdays
» Stats
Members: 75,077
Threads: 248,524
Posts: 2,568,616
Top Poster: JLC (31,651)
|
-
Registered User

Tiger Progression Thread
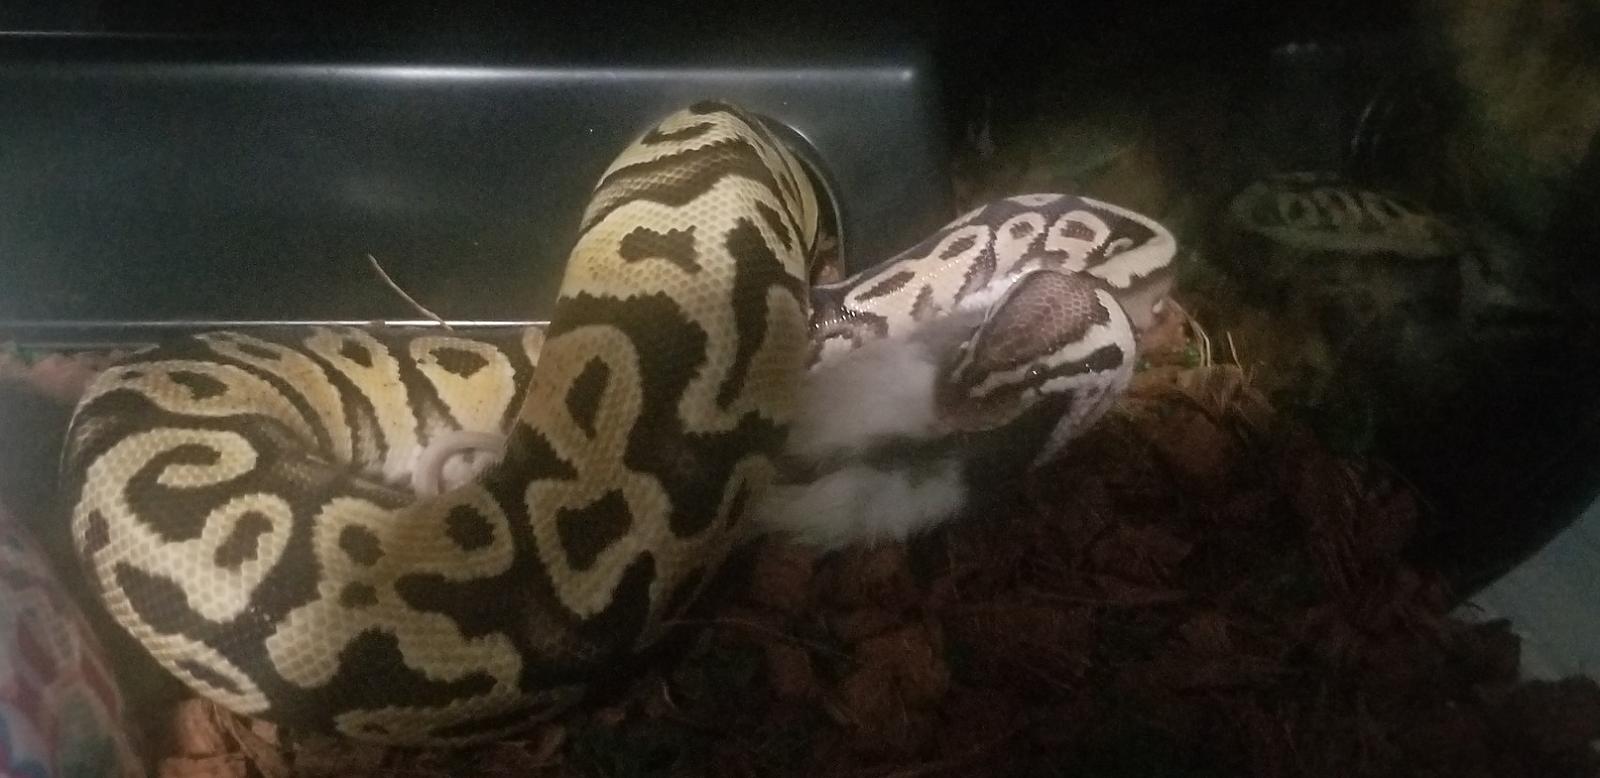
So I got Tiger (formerly Twizzler) 3 months ago as a 7/8 month old at about 160g. He's a Pastel, Mojave, Gravel. I started him out in a 120 gallon tub, moved him to an ExoTerra 36x18x12, and he's been thriving there since. Spends plenty of time outside of his hide exploring, climbing fake vines, his cork log, hanging out. He's been a ravenous eater since day one. I intentionally feed him erratically (not on a fixed schedule and different sized feeders). I might feed him a small rat one week (big meal), skip a week, then feed him two small mice four days apart the next week. Hell, he even tried to eat my hand a while back after I had been handling a rodent carrier box. He's gotten up to 380g since I've gotten him and had two great sheds.
He's been eating live, but I planned to get him on f/t sooner than later. Between changing enclosures, shedding, and target training, it took me longer than I intended. To target train him, I used the feeder tongs. I would show him the tongs on feeding days only, before introducing the rodent, then I'd place the rodent into the enclosure. I saw the target training was working when I would show him the tongs while he was poking out of his hide and seeing them would draw him out. Last time, he slithered out of his hide, followed the tongs all the way to the little rodent tub I was holding, then took a shot at the tub. After I placed the rat in his enclosure, I had him follow the tongs towards where the rat was scurrying until he switched his attention to the rat. Cool, target training done, ready to try f/t.
As far as the f/t method, firstly, I didn't feed him for 12 days beforehand both to get him hungry and so he could poop for me to weigh him empty. I reheated the weaned rat in a bag, in a hot water dish (120°F water changed once). My reptile store let me take a temp reading on their live feeders with my IR temp gun. They read between 88-90°F. When the thawed rat registered 90° on my IR gun, I offered it. I waved the tongs in front of him as a target to get him interested and out of his hide. I then grabbed the rat with the tongs and "walked" him slowly towards the snake, then away, to get him in hunt mode. Finally, I hopped him over in front of the snake and he struck hard. Perfect strike right behind the neck and wrapped under the rat's chin, just like with live ones. I used the tongs to tug on the rat to simulate a struggle and death-throes. Like I expected of him, it was an easy transition to f/t.
At first, I planned to continue to offer him live feeders occasionally to let him hunt for enrichment, but now I know that I won't. I see that I can induce him to "hunt" a f/t feeder. It's also so much more convenient. I would feed him only after he was out of his hide at night, so I used to keep the live feeder rodent waiting those few hours in a plastic tub with fresh water, paper towel substrate, a hide, a tube for enrichment, and a few morsels of food. I would do that to make sure the feeder was hydrated, fed, and comfortable before placing it in the snake's enclosure. The feeder would often urinate, defecate a ton, and make a mess with its food and water all over the holding tub, so I would have to sanitize the tub and accessories after every feeding. Plus, the rodent would often defecate and pee when getting constricted, so I would spot clean the enclosure where he made a mess. F/t is so much cleaner, safer, and no less enriching that I'm glad the switch is done.

-
The Following 4 Users Say Thank You to Kryptic For This Useful Post:
Albert Clark (09-11-2022),Bogertophis (05-30-2023),Homebody (09-29-2022),Ruby (06-06-2023)
-
Registered User
Enclosure:
So I went from a plastic bin to the Exoterra (36x18x12) pretty quickly. Based on how active he is, I figured that he would probably outgrow that tank pretty quickly and really wanted a 48x24x24. Unfortunately, every enclosure was either sold out or unreasonably expensive at the time. So I decided that I could build one for less and began that project last year. I got pretty far, but ended up hitting a point where I needed a second pair of hands. Life got extremely busy and the project got set aside despite not really needing much at all to complete it. Well, I recently measured him to find that he's about 1100g and 3'8" long. His Exoterra was already looking cramped, but that really lit a fire under my backside to finish his new home.
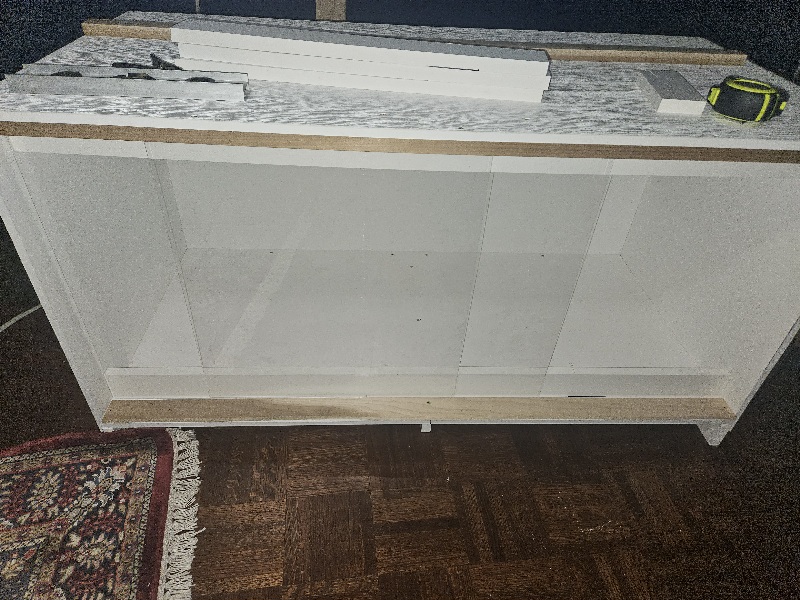
Here's a write up of my build in case anyone were to want to copy it or use it as a starting point for their own. The final internal dimensions are 48" wide, 20¾" deep, and 21¾ high.
Materials:
(all measurements in inches unless otherwise noted)
My build ended up being less expensive than most of the 48x24x24 cages I've been able to find online. That said, I did a lot of price scouring online, have plenty of hardware stores around where I live and work and used discounts to achieve that. You could easily spend more than you would on a premium enclosure on materials alone if you don't price things out carefully.
(4) 24x48x½ PVC sheets
(3) 2½x96x¾ PVC trim board
(1) ¾x1½x96 poplar* board
(1) ¼x5½x48 poplar board
(2) 26x21½x⅛ plexiglass sheets
(2) 50 count packs of 8x1½ wood screws
(1) 50 count pack of 8x1 wood screws
(1) Tube of silicone sealant
*I only installed the wood on the exterior of the enclosure, so the snake should not be in contact with it. That said, some woods are toxic to snakes. I chose poplar because it is a safe wood for reptiles. It is also known as aspen, which some use for bedding.
Tools:
-Electric drill
-Phillips-head bit
-⅛" drill bit
-Saw
-Black Sharpie permanent marker, pencil, or anything else that can mark PVC
-Measuring tape
-Clamps
-Silicone applicator
Design and build:
Three of the 2'x4' PVC sheets form the top, back wall, and floor. The fourth sheet is cut in half lengthwise, creating two 2'x2' sheets that make up the side walls. I cut them using a Dremel rotary tool with a milling bit along with an attachment that allowed me to make a clean, straight cut. You can use any number of cutting tools like a circular saw, etc. Do note that PVC is annoying to cut. If your tool gets too hot, it could melt the PVC and it is hard on cutting bits that aren't designed for it. I definitely don't recommend a hand saw for the project.
Before screwing any two pieces together, I marked where I wanted each screw and drilled pilot holes. It is important to be able to drill straight holes and keep the sheets steady and pressed against each other. Drilling a pilot hole makes driving the screws easier and will prevent damaging the PVC sheets.
I first screwed the inside edge of the side walls to the outside edge of the cage top with 6 long screws on each edge. I screwed the inside edge of the top to the outside edge of the back wall with 5 long screws. Next the the inside edges of the side walls to the outside edges of the back with 5 long screws per side. The outside edge of the cage floor was placed so that the bottom was aligned 1½" up from the bottom of the two side walls and the back and affixed with 3 long screws to each side wall and 5 to the back.
On the bottom I then screwed 4 cut pieces of the PVC trim board to the bottom as a base to both elevate the cage and reinforce the floor. The description would be way too clunky, so here's a picture.
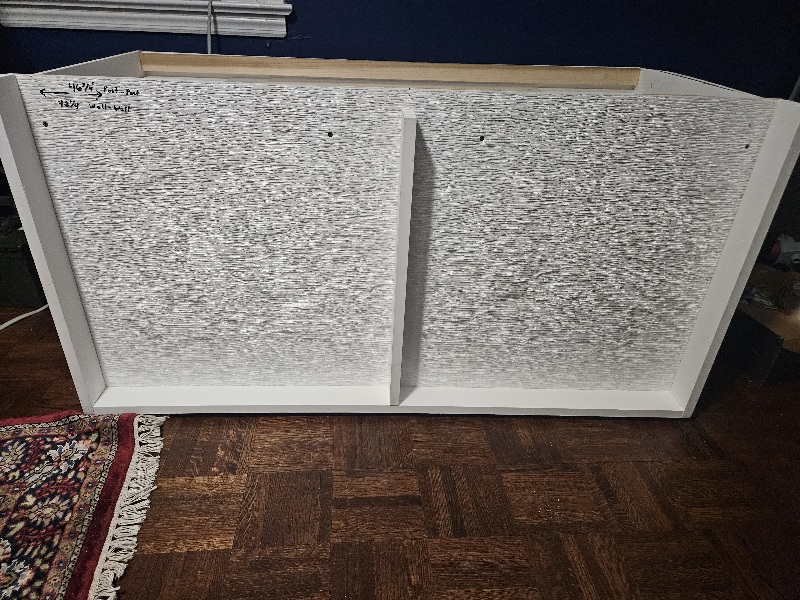
Next I cut the 8 ft poplar board in half, placed it so that the ¾" edge was aligned with the face of the cage top edge, and affixed it with short screws. I aligned the poplar plank with a vertical line straight down from the inside of the poplar board and affixed it to the cage floor with short screws so that the ¼" edge was the vertical face. I used a hand saw to cut it flush with the edge of the cage floor. I then aligned each of the two 48" PVC trim boards so that there would be a a 0.4" (10mm) gap between the inside edge of each wood board and the 2½" side of each PVC board, then and screwed each to the cage ceiling and floor, respectively, from the outside in. This forms the channel for the plexiglass slide doors.
Finishing:
The finishing steps are to install your heating elements, use silicone sealant to seal all of the inside edges, thoroughly clean and sanitize the cage, then finally, add substrate and decorate.
I'm going to be installing a radiant heat panel, so I'll have to screw it to the ceiling of the cage and drill holes for the cord and the temperature probe.
In terms of decoration, I'll be using an organic topsoil, coco fiber, and sand mix recommended by Reptifiles as a substrate. Coco husk and spagnum moss will be thrown on top for litter and to make spot-cleaning easier. I'm currently researching good live plants that I could use and would like to incorporate elevated platforms for him to climb.
-
The Following User Says Thank You to Kryptic For This Useful Post:
-
Re: Tiger Progression Thread
Thank you. I really appreciate the time and effort that went into writing this up for the benefit of the forum.
1.0 Normal Children's Python (2022 - present)
1.0 Normal Ball Python (2019 - 2021)
-
The Following User Says Thank You to Homebody For This Useful Post:
-
Registered User
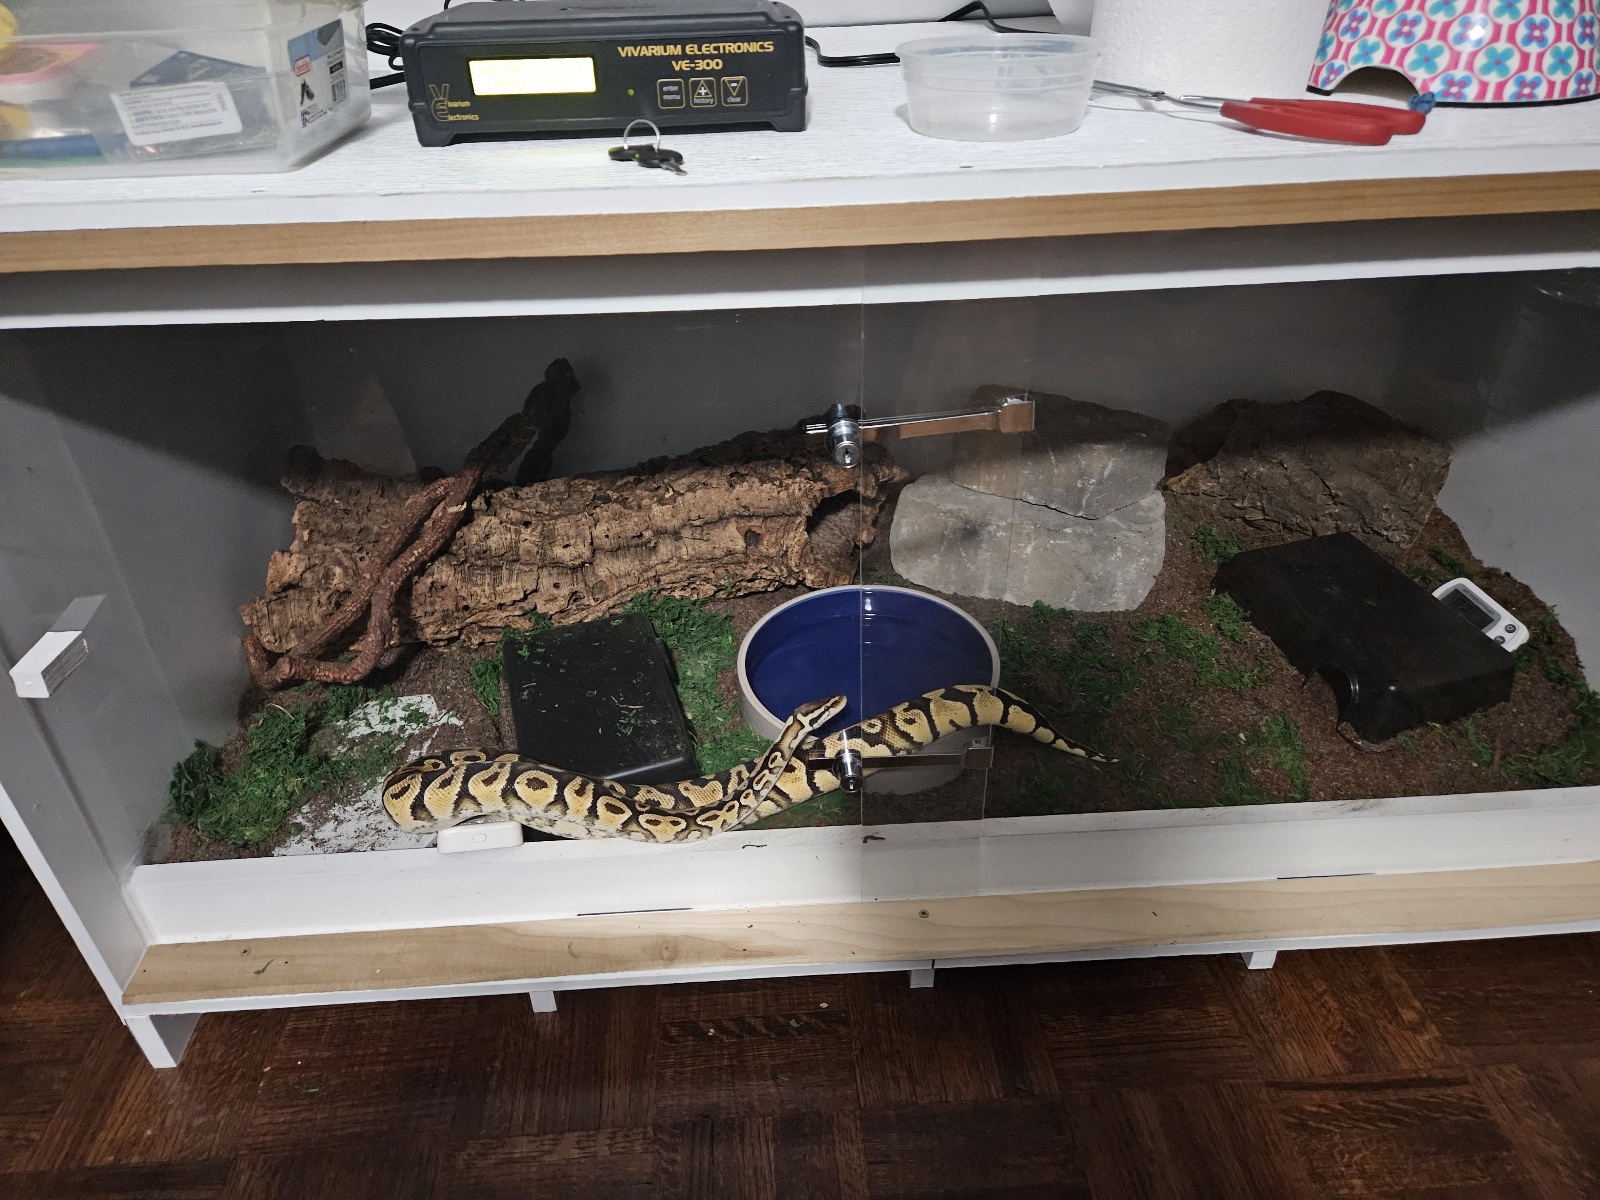
Finally got it all set up. Silicone sealed it, added two more pvc planks under the floor to help support the weight, gave it a thorough cleaning, degassed the radiant heat panel, added the substrate & enrichment, and made sure the temps and humidity were all in spec.
He's been exploring like crazy and it's great to see him have more space to roam. He was in an Exoterra Large Low 36L x 18W x 12H. That was great for the first 6 or so months I had him, but by now he looked really cramped whenever he was out and about.
Still looking into plants that would do well in there.
Now I just need to clean out the Exoterra real well and get the other half's permission to put something else in there. I think it would be a real mansion for a Kenyan Sand Boa with a thick layer of sand.
-
The Following 3 Users Say Thank You to Kryptic For This Useful Post:
Bogertophis (05-30-2023),Homebody (05-30-2023),Ruby (05-29-2023)
-
That came out beautifully, & your snake is no slouch to look at either... From all the information in your posts above, this snake hit the jackpot getting you for an owner. Is this your first snake? Either way, you've done an impressive job. From all the information in your posts above, this snake hit the jackpot getting you for an owner. Is this your first snake? Either way, you've done an impressive job.
Last edited by Bogertophis; 05-30-2023 at 09:47 AM.
Rudeness is the weak man's imitation of strength.
Eric Hoffer (1902 - 1983)
-
The Following User Says Thank You to Bogertophis For This Useful Post:
-
Registered User
Thanks a lot! Yup, this is my first snake. Thankfully, there's a lot of good info out there on how to keep them well these days. Plus building and now sprucing up the enclosure is its own fun. I'm planning on planting a pothos and snake plant in there and adding some springtails, dwarf isopods, or both to go full bioactive. I'll probably do a test run with potted plants and if he doesn't completely wreck them, then I'll plant them and add a cleanup crew culture.
-
The Following User Says Thank You to Kryptic For This Useful Post:
Posting Permissions
- You may not post new threads
- You may not post replies
- You may not post attachments
- You may not edit your posts
-
Forum Rules
|


 Reply With Quote