» Site Navigation

1 members and 2,713 guests
Most users ever online was 6,337, 01-24-2020 at 04:30 AM.
» Today's Birthdays
» Stats
Members: 75,078
Threads: 248,524
Posts: 2,568,615
Top Poster: JLC (31,651)
|
-
Building & Plumbing a Rodent Rack
Here are a bunch of pictures I took when I built a mouse rack about a year ago. I thought some people might be interested to see it while in the process of building it.
Sorry, it's kind of long. It doesn't all fit so had to split it up, first post is building it, second post is plumbing.
-----------------------------------------------------------
Here are my plans for building a 40 tub mouse rack using small Van Ness cat litter pans that I found at Target. These tubs are approximately 10" X 14-1/2" . If you use another brand of tub, you'll have to adjust the measurements around the dimensions of the tub. Each level holds 4 tubs and the entire rack is 10 levels high. First, start off with the frame of the level. I used 2" X 2"s that are 43 1/2" long. Nail this onto the end braces that are 12" long. I used 2-1/2" 8d finishing nails and glue. Here are pictures of what they look like.
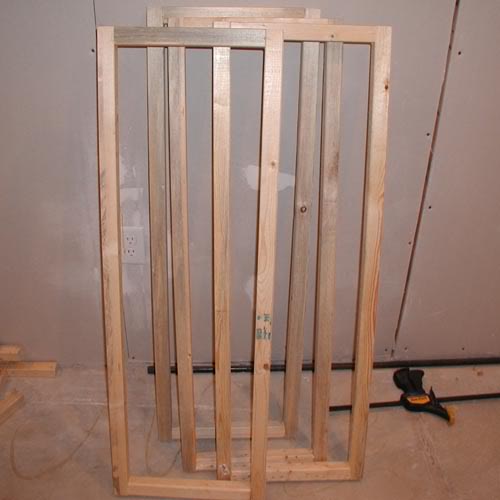

Then you need three more 12" braces, one in the exact center of the level so center the middle 12" 2" X 2" brace at 21-3/4"

The other two braces are centered at 11-1/4" from each end. All of the braces are attached with glue and 8d finishing nails.

Once the frame is finished staple on the hardware cloth screen, make sure it's tight. The mesh size you use has to be small enough so the mice can't squeeze through (1/2" mesh is too large) But large enough so that the mice can eat through it, 3/8" mesh is ideal but impossible to find. 1/4" mesh works just fine though.
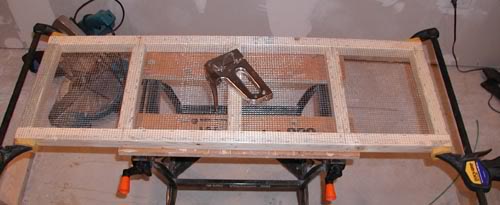
Next you'll need to put on some spacer bars and slide rails to hold the tubs in place tight against the screen. I used 1/2" plywood. The spacers are 3/4" wide by 14-3/4" long you'll need 5 per level, the slide rails for the ends are 1-1/8" X 11", you need two of these per level, and the slide rails for the middle sections are 1-1/2" X 11" and you'll need 3 of these per level.

Attach the spacer bars against the screen side as shown in the picture, glue and tack them down to the 2" X 2" braces with some 1" brads. The spacers should be placed so that there is just short of 10" of space between each one (about 9-7/8" should be right, make sure they're all even)

Make sure the tubs fit between the spacers before going on, they should be tight but not so tight that they are hard to pull through.

The slide rails for the middle spacers should be placed so that they are centered over the spacer and are even with the back of the level. There will be about a 4" gap between the front of the slide rail and the front of the level. This is so that you can remove the tub without running into the sipper valve that will be going through the screen at the front.

Here is a picture of an end slide rail and a middle slide rail so you can see that the middle rails are centered on the spacer and the ends are flush with the spacer on one side. I attach the slide rails with glue and 2" 6d finishing nails, make sure you drill guide holes first that are slightly smaller in diameter then the nail before nailing them on. Otherwise you could split the slide rail or the spacer underneath it.

Heres a picture of a finished level upside down and shown from the end so you can see the gap at the front of the slide rails.
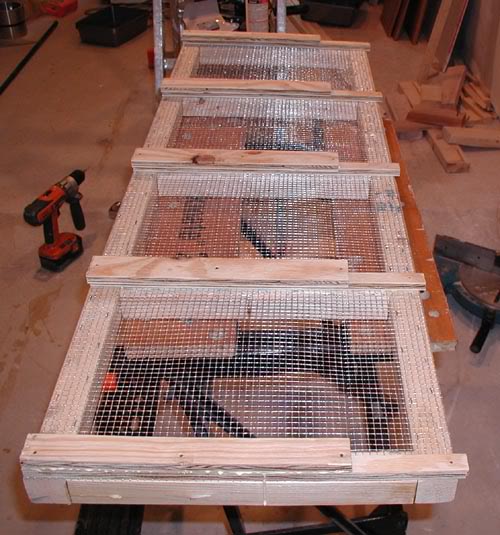
Here is a picture of the completed level flipped right side up complete with tubs.

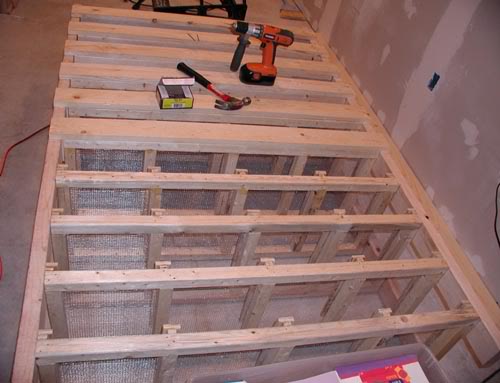
I used four 2" X 4"s as uprights, one at each corner, to attach the levels to. The 2" X 4"s are each 72-1/2" long. I marked them at 6" from the bottom and then every 7" after that (levels are attached so that the top of the level is at 6" from the bottom, then 13" then 20" then 27" etc...) for a total of 10 levels. Then I attached 1" X 4" boards 46-1/2" long, to the back of each level as a backstop for the tubs and as additional bracing to help keep the rack square.
Last edited by rabernet; 11-18-2006 at 01:17 PM.
Reason: Merging thread to sticky
-
The Following 13 Users Say Thank You to MarkS For This Useful Post:
- + Show/Hide list of the thanked
-
adamjeffery (06-26-2011),bamf64 (11-18-2009),DNACurtusK (01-24-2013),EdShal (09-07-2010),Elekia (10-15-2018),MR Snakes (12-11-2018),PennywisePythons (09-18-2019),Sarin (02-02-2010),spitzu (01-11-2011),T&C Exotics (12-17-2009),twisted007 (01-17-2010),Wh00h0069 (06-12-2009),WmHrbst (07-31-2017)
Posting Permissions
- You may not post new threads
- You may not post replies
- You may not post attachments
- You may not edit your posts
-
Forum Rules
|


 Reply With Quote